Controlling my A/C with a Gameboy
Mon, Apr 27, 2020Please note: some GIF images will flash briefly.

I programmed this Gameboy (cartridge) to control my air-conditioner!
Last year, I was lucky enough to be gifted a Gameboy Color in great shape. Apart from its intended gameplay features, I also wanted to try and build something meaningful with it, so I made this application to control my air-conditioner over its existing, reverse-engineered infrared protocol.
The Gameboy Color (GBC) differentiates itself from its earlier generations with some new features:
- Color (aha!)
- An option to run at twice the processor speed
- A set of infrared diodes to transmit and receive
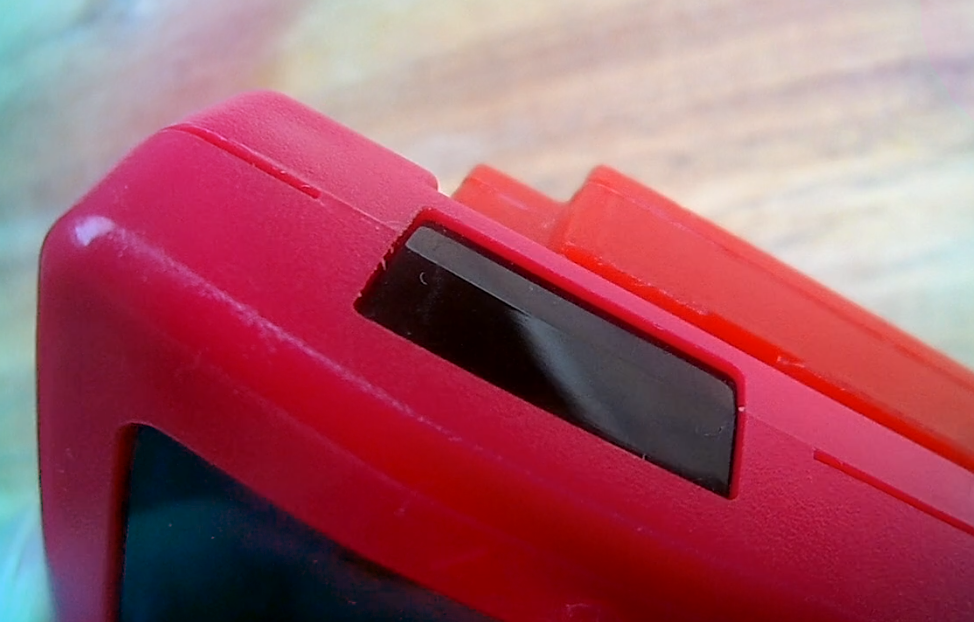
The infrared transceiver on the top-left corner of the Gameboy
The IR transmitter piqued my interest — I immediately thought of building an air-conditioner remote with the GBC, and searched if anything like that existed. Apparently a ‘Mission Impossible’ game could record and replay infrared signals, thus validating that the technical bits were possible.
Required hardware
Starting from scratch, I needed to get additional hardware to build and run code on the actual Gameboy.

This red game cartridge originally contained Pokemon Red.
Re-programmable game cartridges
Developers in the past used to have specialized hardware to emulate game cartridges, however I found that it was more affordable (~US$4) to reprogram modern bootleg game cartridges.
Normally, official game cartridges can only be programmed once. However many bootleg cartridges do not have this limitation and can be freely rewritten. As a nice bonus, the sticker on the bootleg cartridge can be replaced after the cartridge is reprogrammed, and it really feels as though I have built a new game cartridge in 2020.
Game cartridge programmer
To write into the cartridges, a programming card is required. I used InsideGadget’s gbxcart-rw as it was available at about US$30, well documented and easy to use. They even have a page on identifying cartridge models to make flashing them easier.
Infrared Communications
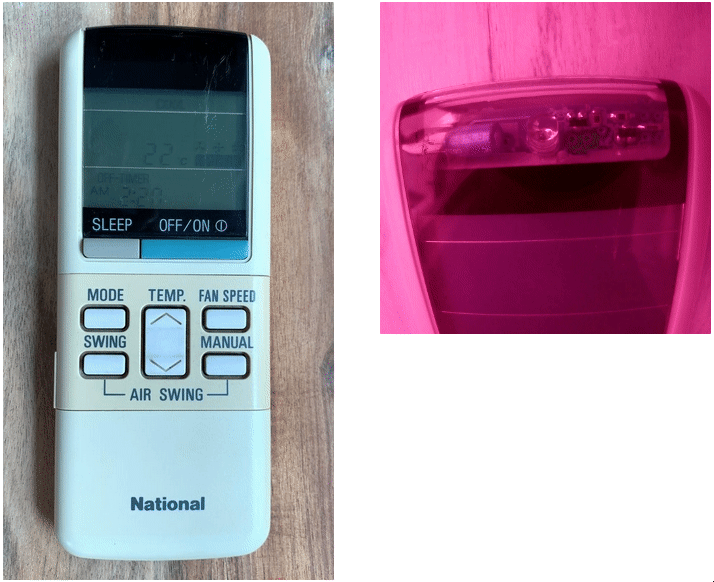
The target A/C transmitter in both visible-light and IR to reveal its internals.
To control the A/C, the Gameboy essentially has to “blink” its infrared (IR) LED in a very specific pattern, just like the original IR remote. Most brands have their own implementation, however the company which built my A/C, “National”, did not appear to exist anymore, and the internet has little to say about their products.

To understand the packet layout, I drilled a small hole and soldered a thin wire onto the original transmitter to capture the signal. There are less invasive techniques, though this particular process records extremely clean signals.
The captures showed that the signal was modulated (toggled on and off rapidly) at 36.5kHz, which deviates from the more common 38kHz. The modulation will get a bit tricky later in the development process since there doesn’t seem to be an easy, in-built way for the Gameboy to switch the IR LED at 36,500 times per second.
After capturing the signals of different temperature and mode configurations, some patterns can be discerned, and I could reliably generate and transmit IR commands to my A/C via a relatively modern microcontroller. Equipped with enough understanding of the IR communications, I could then start writing code with an idea of what to expect from the Gameboy.
Picking a SDK
Gameboy developers appear to be polarized between building software with C (via GBDK) or assembly (via RGBDS).
GBDK is well documented, comes with plenty of examples, and is easy to get started. However it is based on an ancient SDCC build and lacks some C features such as inline assembly through __asm__.
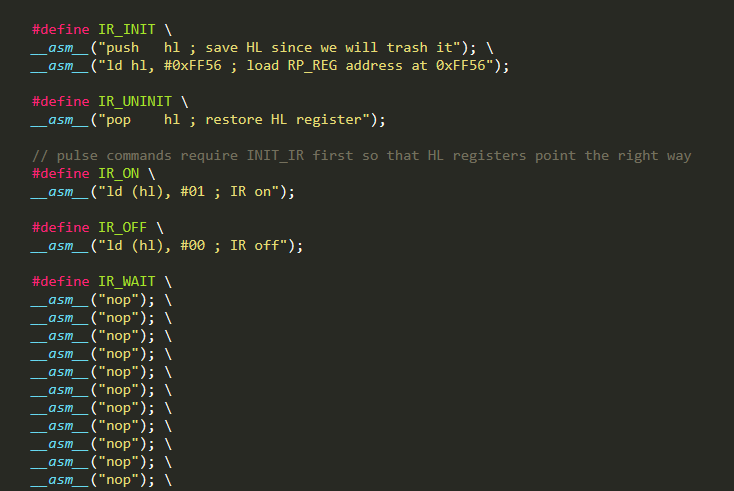
Purists would recommend assembly for full control, since the platform comes with unique constraints such as limits on program size (normally 32K max), sprites (40 max), speed (effectively 1MHz, twice for GBC. Modern computers run at thousands of MHz).
Working with assembly can get cumbersome when iterating quickly. C is convenient for tasks like preparing the screen, drawing sprites, processing input logic and generating the IR packet. However, the actual IR transmission is timing-critical and specifically required use of assembly; my final, working implementation depended on a specific number of NOP instructions, so that the Gameboy CPU can wait for a precise few microseconds when toggling the IR LED.
Fortunately, the “GBDK-N” project solves this problem by updating the GBDK headers for use with modern SDCC, thus enabling the best features of both ASM and C.
Controlling the IR LED
Working with the GBC’s IR LED is surprisingly easy! Assuming that IR-receive capabilities were not required, turning on the IR LED was simply:
RP_REG = 1;
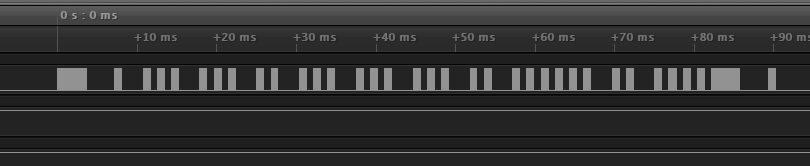
Here’s the same GBC transceiver in the IR band, when the LED is toggled:
Generating the modulated signal
The Gameboy had a hardware timer, which in theory should be a good fit for generating the IR modulation. However I had difficulty configuring it to operate at the desired frequency.
I opted for the simpler path of using the entire CPU to process the modulation during the brief transmission period. It’s not pretty, though as consolation, Nintendo also does this sometimes too — for example, in Pikachu’s distinct cry.
The NOP array can be adjusted to fine-tune the modulation frequency.
Verifying the transmission
The number of NOP instructions in the IR_WAIT macro was guesstimated based on the instruction’s execution time relative to the configured processor speed. My calculations were not exact, and my first try in transmitting the IR packet was a failure. The overall shape of the packet was correct, however the modulation frequency was somewhat off.
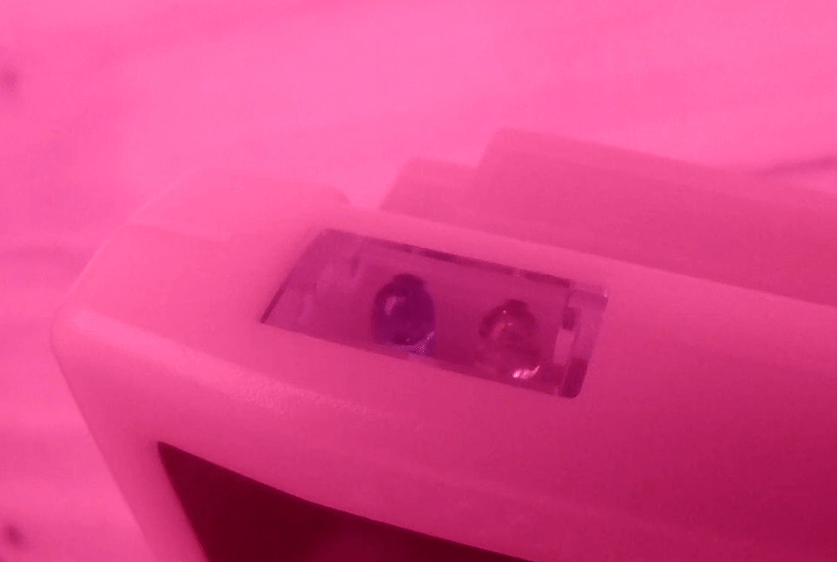
Just like the A/C transmitter, it was possible to tap into the Gameboy’s LED signal lines to inspect the output data. This time however, I did not want to open up or modify the Gameboy.
An interesting trick about LEDs is that they can also work backwards — when they receive light, they can also emit tiny bits of electricity. A commercial product by AnalysIR (with open schematics) uses this property, where a LED is hooked up to an oscilloscope to record incoming signals.
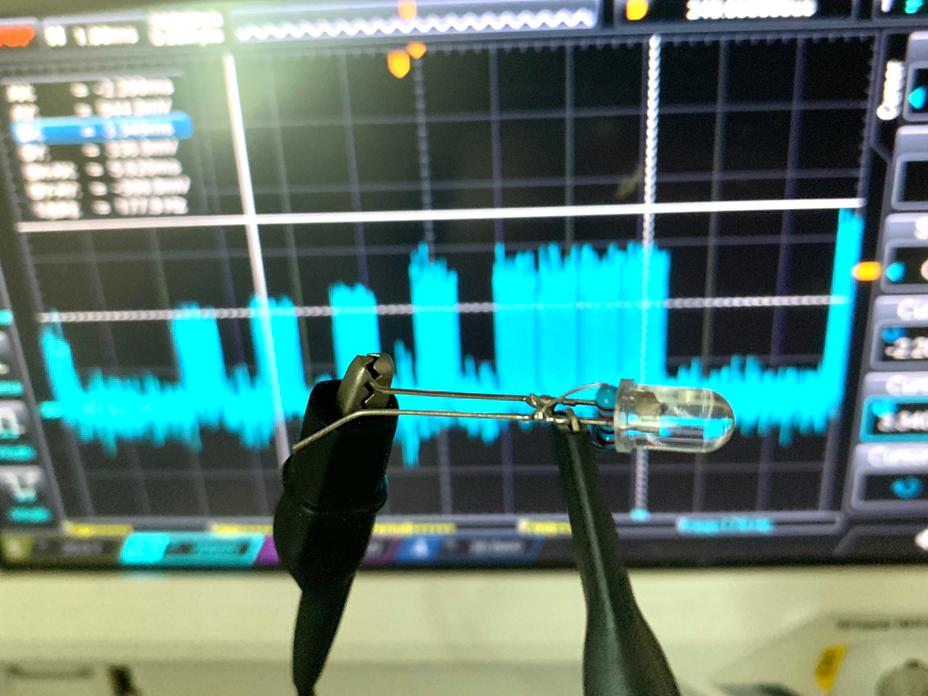
My implementation of the “Silver Bullet”
The setup only requires an IR diode, and a 22k resistor (..and an oscilloscope). The output signal is a good representation of what the receiver also sees. With this, I could fine-tune the IR_WAIT macro until it was close enough to 36.5kHz..
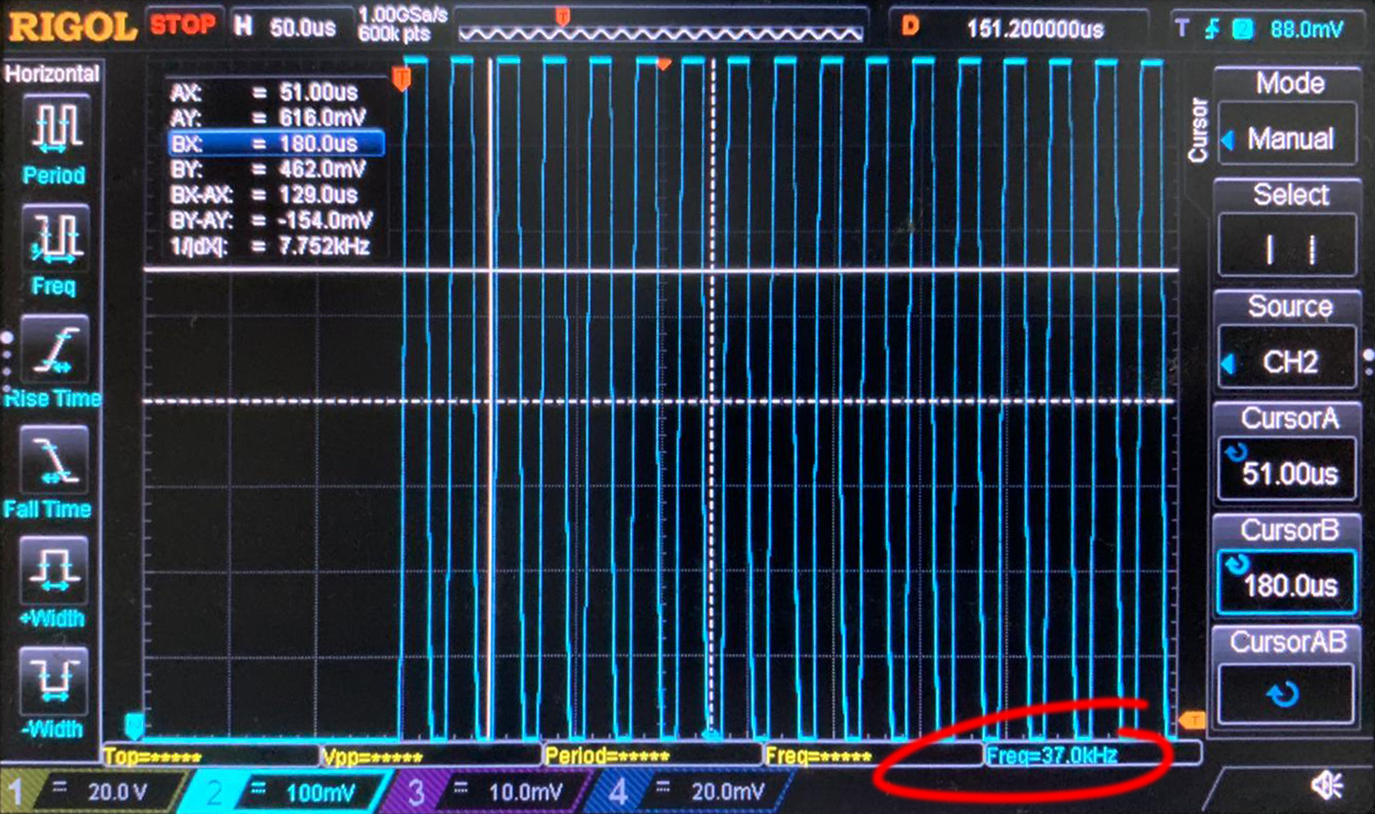
At about 37kHz, the air-conditioner started beeping! The Gameboy’s IR transmitter is directional, and requires direct line-of-sight to successfully communicate with the A/C. Apart from that, it functions just like the original transmitter.
Conclusion

It works! I’m very excited at how it all turned out. All the hardware constraints made for a very contrasting experience when compared to, say, modern-day web development.
- The icons were hand-drawn, since my lazy routine of picking icons off the Noun Project would not work (downscaling large icons just doesn’t work well).
- GBDK’s
printfwould destroy the background since it draws onto the same background layer (itself a hack to work around the sprite limitations) - The IBM-PC font was also hand-redrawn as sprites, and unused glyphs were omitted to conserve memory.
- Basic actions like loading an image were hurdles, as they had to be dissected into 8x8 chunks, paired with a palette, and inserted while the display was off.
Even with its age, there are still plenty of people working on Gameboy-related projects today. If you have ever thought of trying to develop for the Gameboy, please try; emulators are free and very accurate.
The source code for this project is available here.
Notes
In theory, the cycle-accurate emulator could act like a logic analyzer by logging the CPU clock timestamp whenever the IR register is written to. However the emulator that i worked with (BGB) was unfortunately closed-source, so this was the more difficult option.
Here are some fantastic resources for getting started on Gameboy programming:
- Easy-to-follow introduction GB ASM : https://eldred.fr/gb-asm-tutorial/index.html
- Writeup on a flappy bird clone : http://voidptr.io/blog/2017/01/21/GameBoy.html
- Directory on everything Gameboy : https://github.com/gbdev/awesome-gbdev
- Very detailed writeup on building a game from scratch : https://www.gamasutra.com/blogs/DoctorLudos/20171207/311143/