Building Braille signage with PCBs
Fri, Oct 27, 2017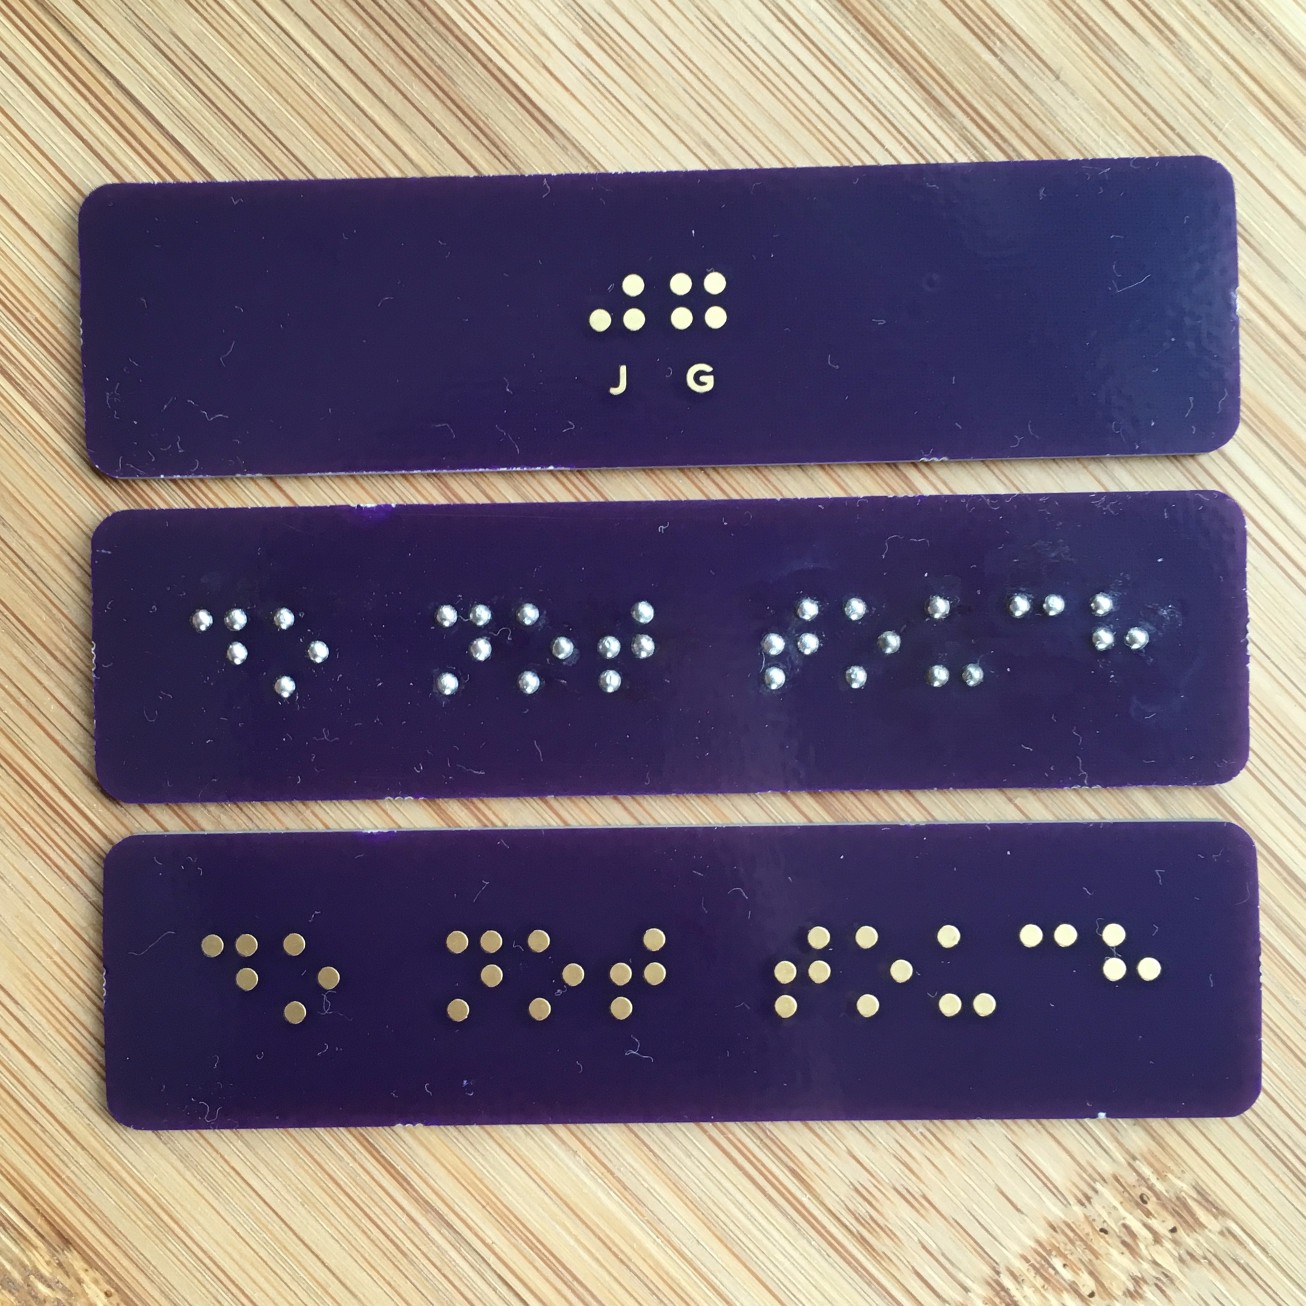
This was designed and processed in the comfort of home! Hopefully this technique may enable more people to improve accessibility for the visually impaired.
A while ago, I passed some damaged Braille signs and felt that repairing them may be difficult or infeasible. It led me to wonder about how one could go about building a Braille signage. Typical commercial approaches involve:
- Accurately punching sheet metal
- Pressing (and binding) metal bearings into plastics
While working on PCBs, I also noticed that solder tends to form a prominent bead on round pads. I decided to design, order and build a bunch of Braille PCB signs as an experiment, and so far it appears to be excellent!
Design
Braille Standards
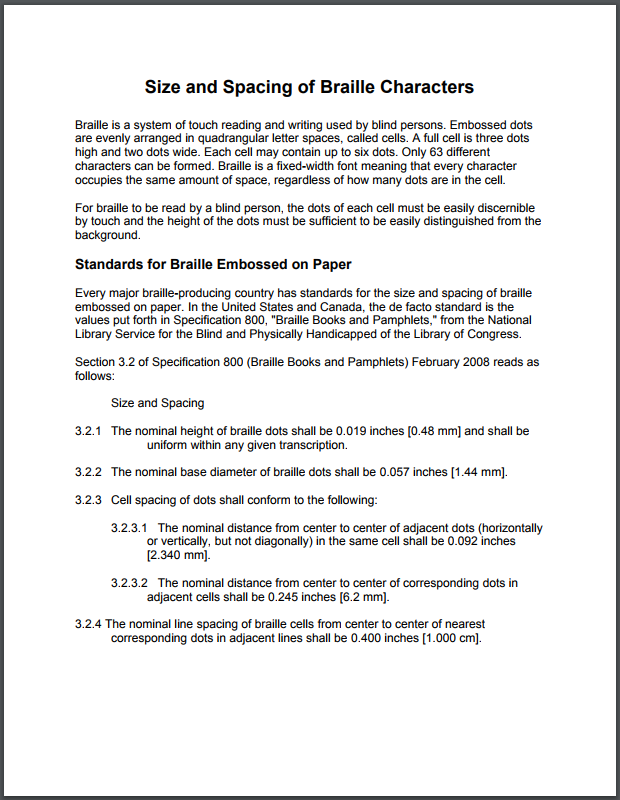
Braille has regional standards, and this particular design follows Braille Authority of North America’s guidelines. The dimensions and spacings of the dots are defined in this PDF document. A challenge is getting the height of the dot to about 0.6 mm, a factor that this design barely manages to scrape by.
Templates and fonts
Instead of translating and manually drawing the dots, using templates and fonts speeds up the design process tremendously. I used the templates and fonts from PharmaBraille in Photoshop to design and check the board.
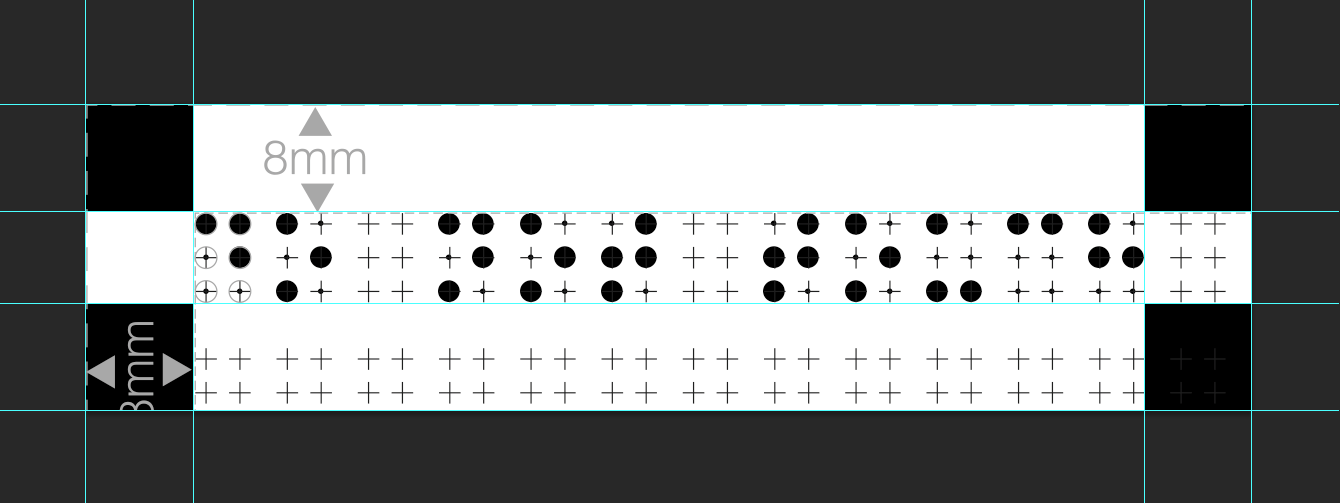
Importing the design into KiCad was straightforward with Bitmap2Component, with a similar process to building a PCB lapel. As long as the DPI settings are correct in the design, the same value can be keyed into Bitmap2Component and the dimensions will be correct.
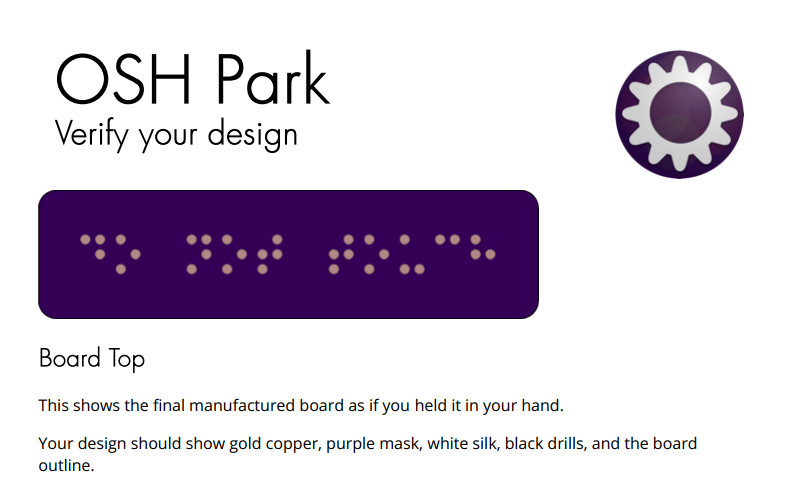
The best way to verify the board design is to see it from the fab’s perspective. Mistakes where the components are “inverted” can be easily identified here with OSHPark’s (fantastic) preview.
Assembly
Assembly is simple: enough lead-free solder needs to be added onto every point consistently, and there are a few approaches to doing this:
Manually, with an iron and hot air
This was the approach I took, and is very accessible as long as you have solder and an iron / hot air gun. This process offers a lot of control, but due to the “handmade” nature of the process, the dot sizes can have significant deviation.
Solder paste
Solder paste may offer greater consistency when paired with a stencil. The stencil might have to be either sufficiently thick or wide enough to hold enough solder paste, else the dot may not meet the height set in the standard.
Wave soldering
Wave soldering will most likely offer the most consistent results among the options, although it may have difficulties creating a tall enough dot.
Results!
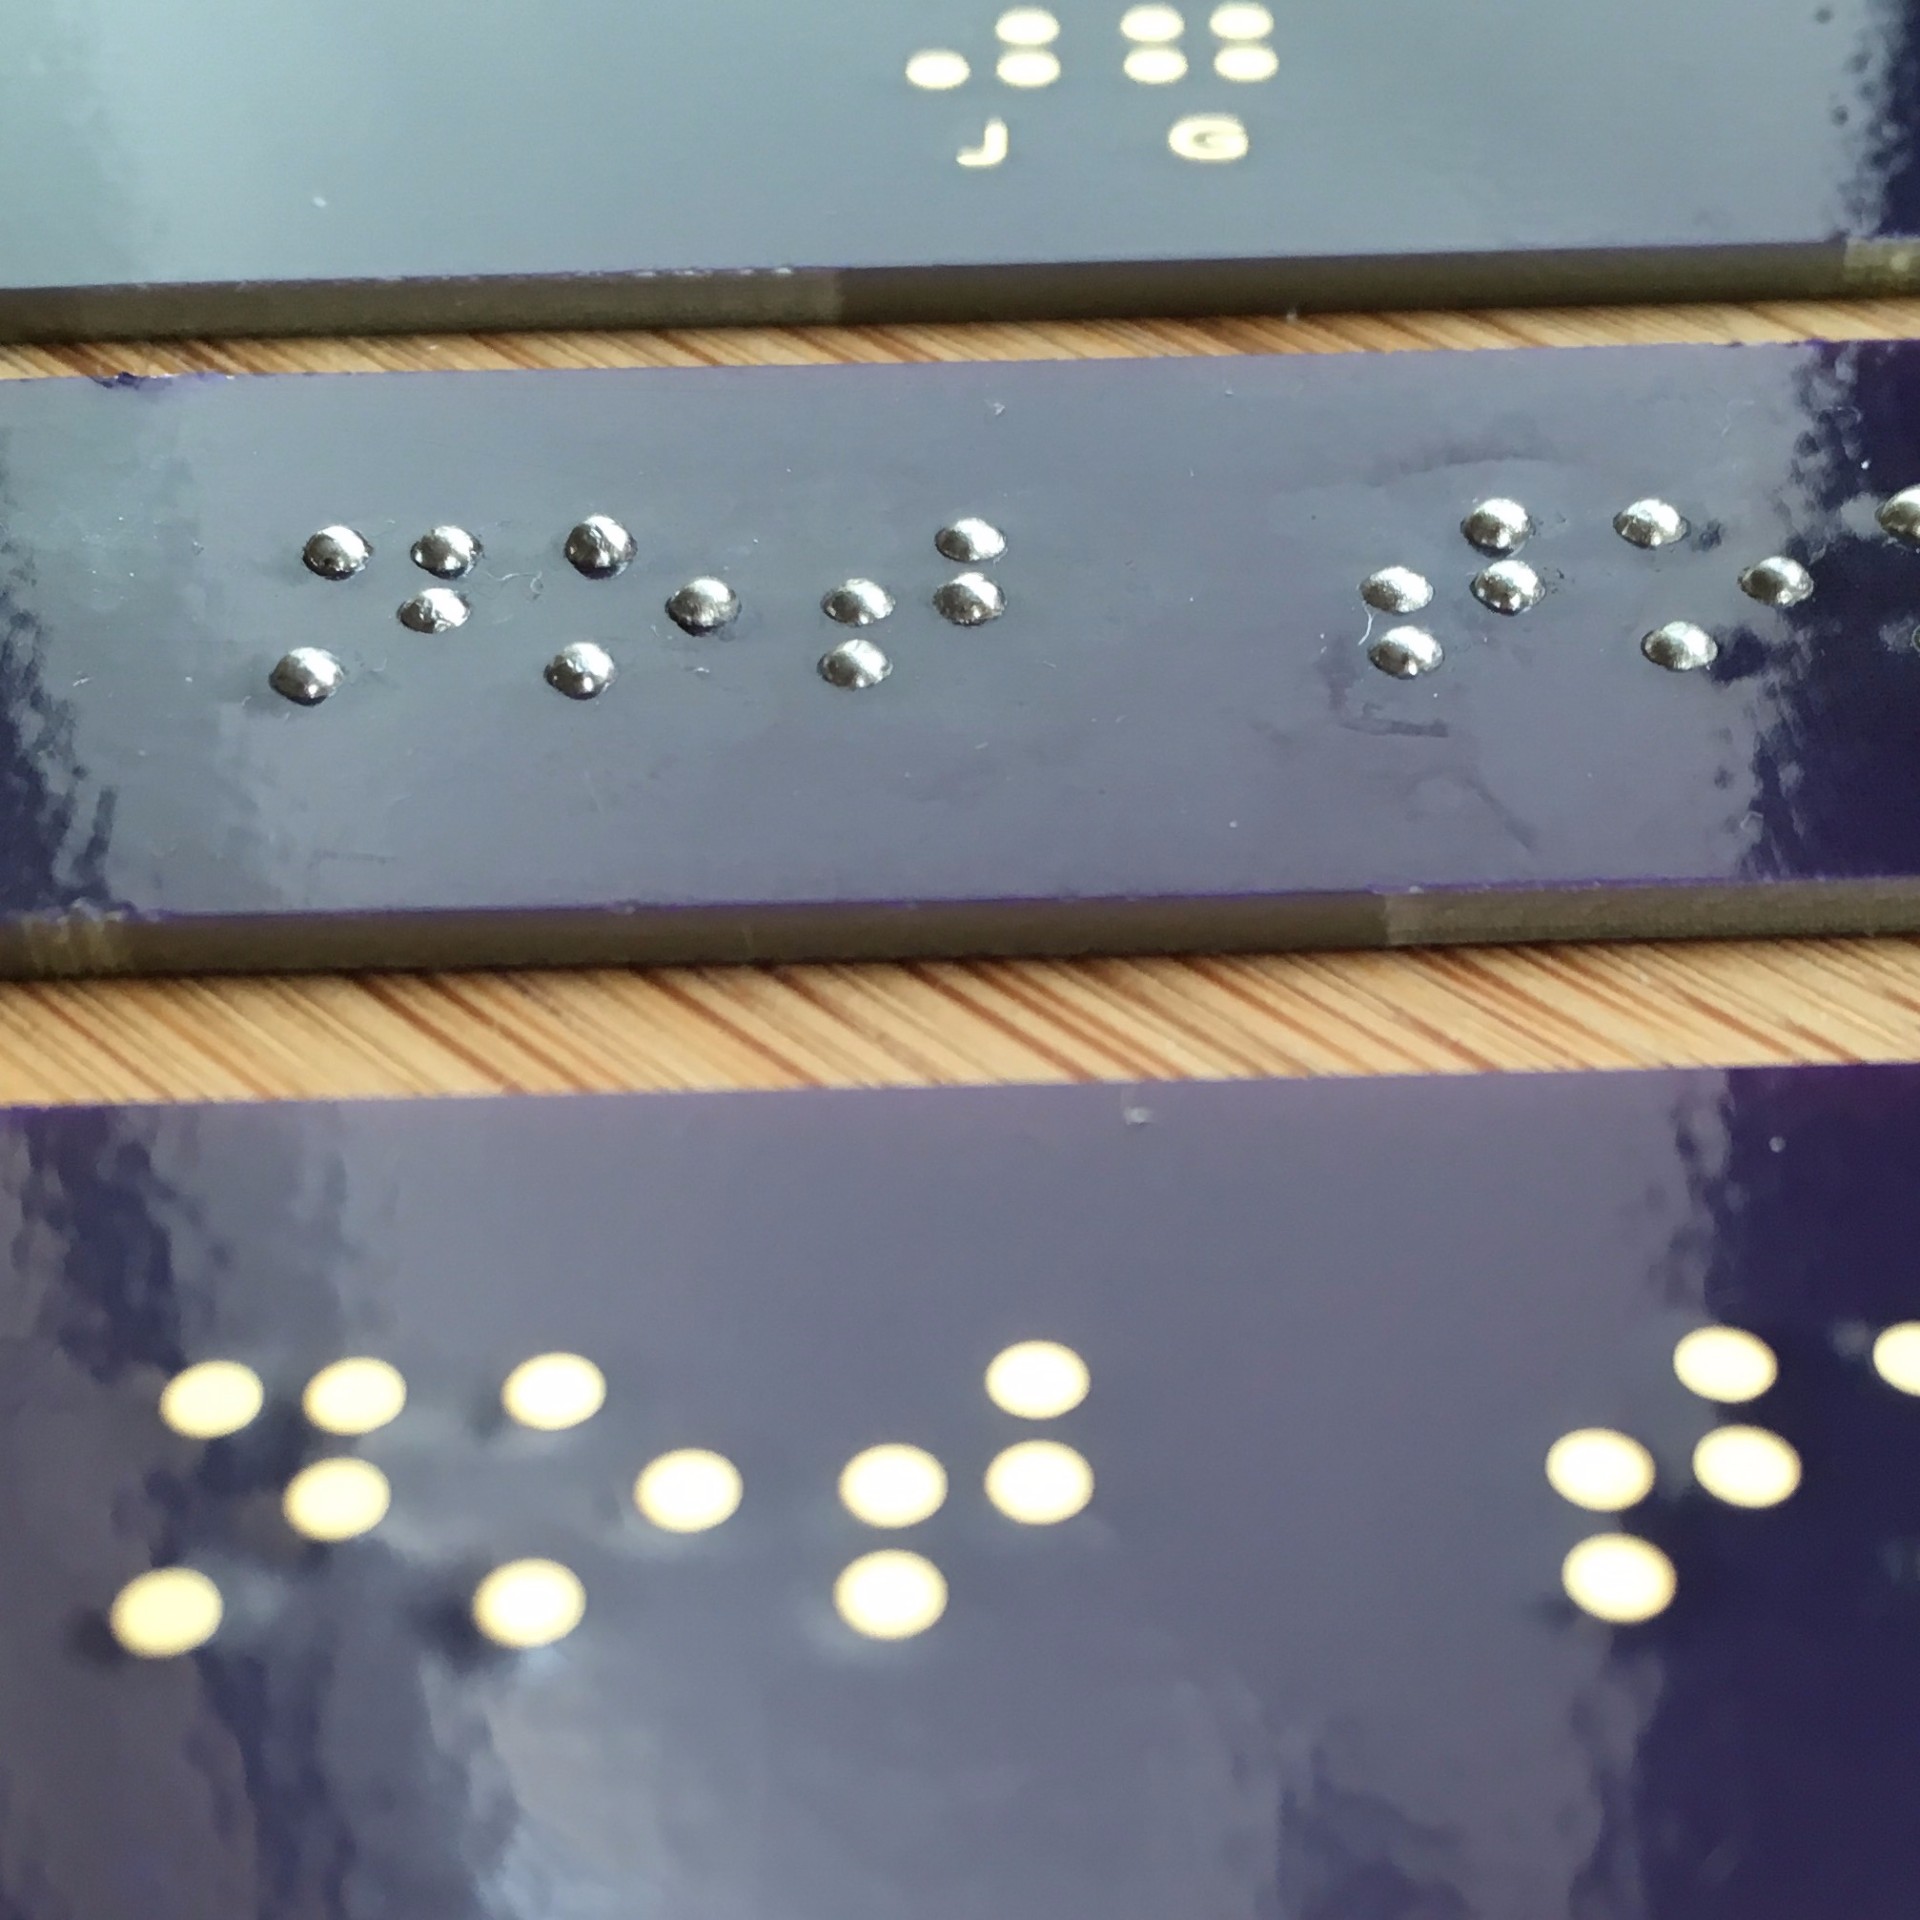
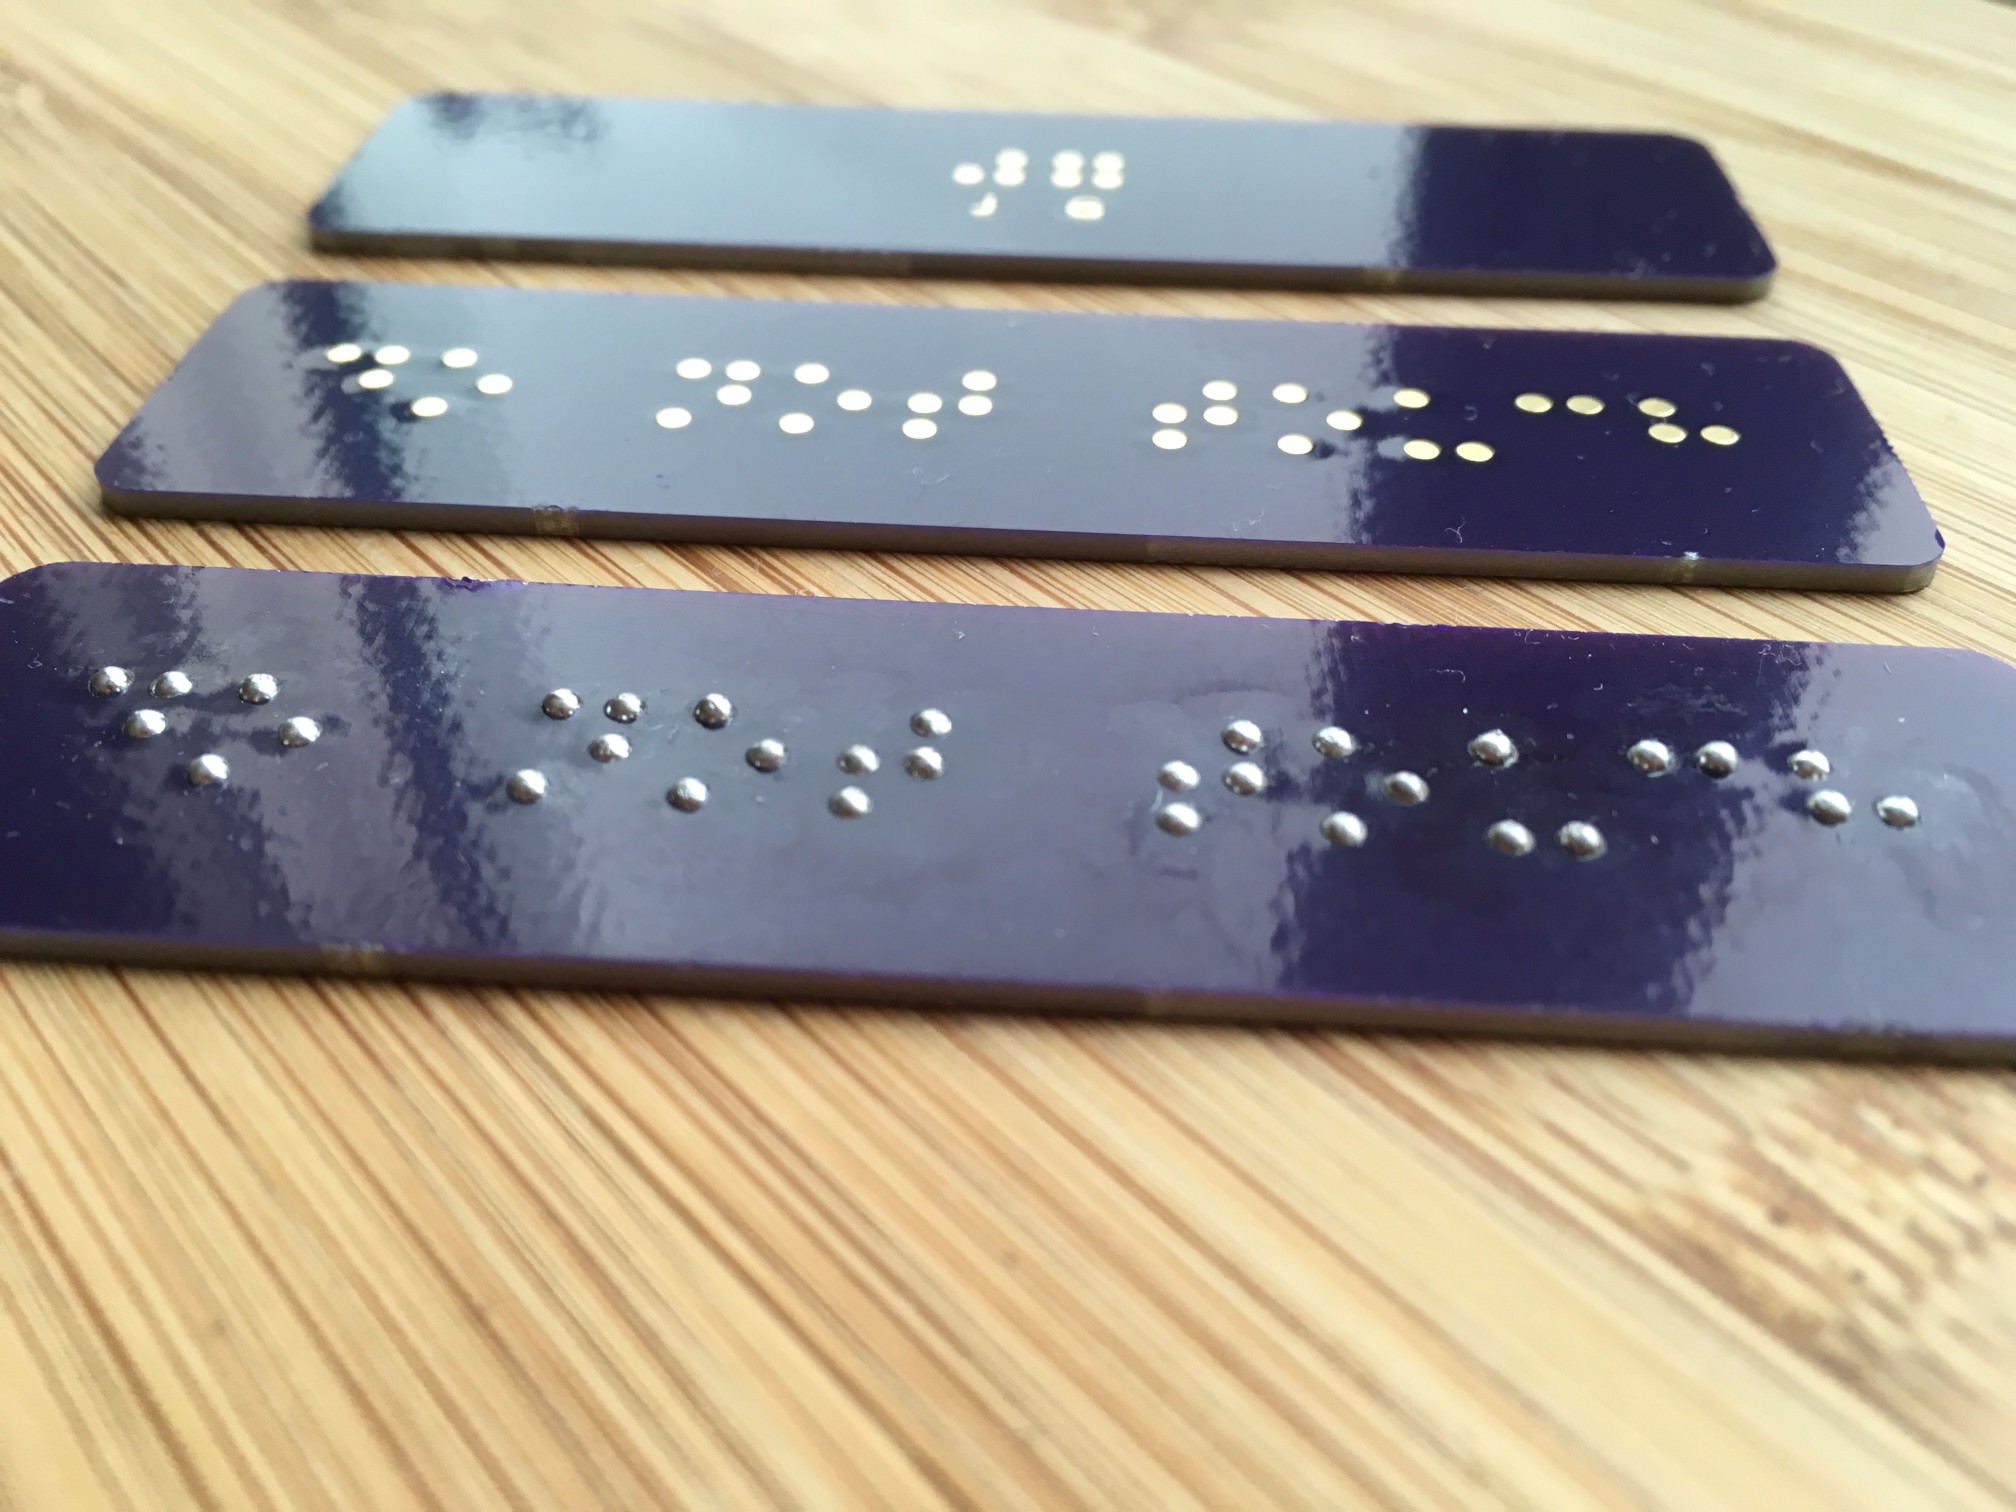
This experiment appears to be successful so far and I hope this will be a step forward in improving accessibility for the visually impaired.
Thank you OSHPark (again) for making this project possible!!